How to setup webhooks
Introduction
Webhooks are a way to get notified when something happens in another application or service. This is useful if you want to integrate with a third party service, like a shipping service, or a payment gateway. OttoFMS makes it very easy to let a FileMaker file receive webhooks.
Before you begin
API Key created
OttoFMS uses API Keys to authenticate incoming webhooks. You should be able to create an API Key for the FileMaker File you want to receiver webhooks. If you haven't done that yet, please use the API Key guide first to setup an API Key for your target FileMaker file.
FileMaker file preparation
OttoFMS uses a script and a table with a couple of fields to receive webhooks. We provide a FileMaker Addon that you can use to quickly add all the schema you need to get started.
- Ensure your target FileMaker file is hosted on a OttoFMS powered server.
- Ensure you can create an API Key for the target FileMaker file.
- Download OttoReceiver.fmaddon
- Unzip the archive
- Double click the OttoReceiver.fmaddon file to install it in the proper location.
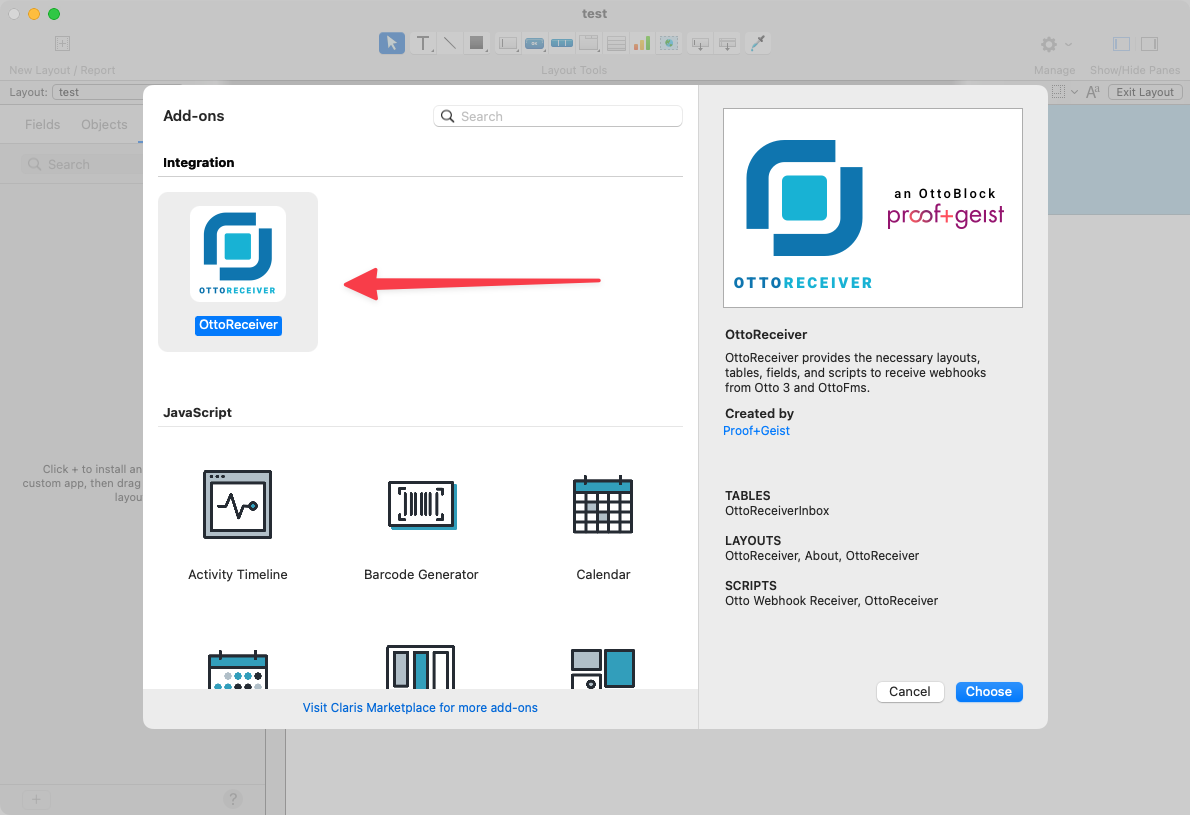
- Open the FileMaker file you want to receive webhooks, Go into Layout mode and install the new Addon. (See below for more details)
Registering a webhook
Technically you don't need to register a webhook, but it is a good idea to do so. It will make it easier to manage your webhooks and it will allow you to easily test your webhooks.
Login to OttoFMS
Login to the OttoFMS web console.
Navigate to Webhooks
Navigate to the Webhooks page in the web console.
Register a new webhook
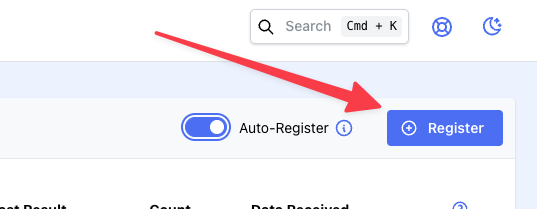
Click the "Register" button in the upper left to register a new Webhook.
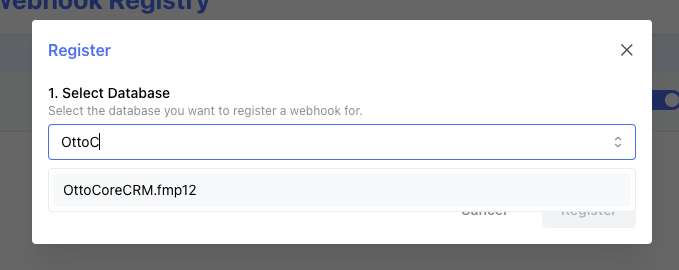
Select the target FileMaker file
First select the FileMaker file you want to receive webhooks. You can select a FileMaker file from the dropdown.
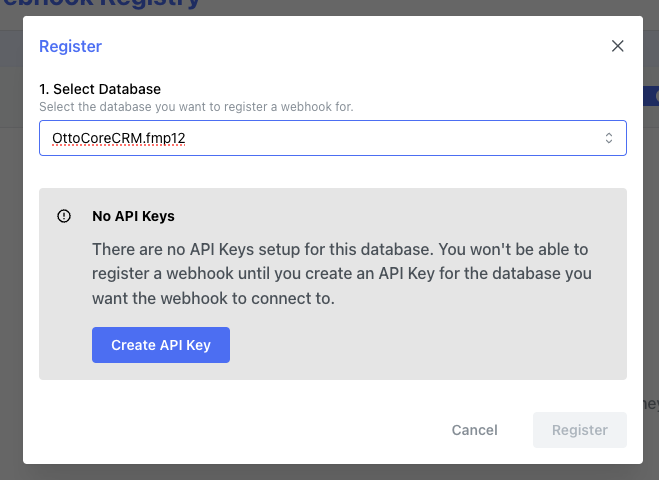
Create an API Key (optional)
If you haven't created an API Key yet, you can click the "Create API Key" button to create a new API Key.
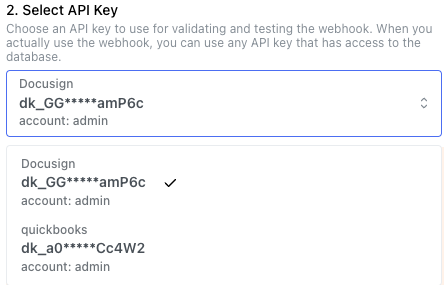
Select an API Key
If there are multiple API Keys for the FileMaker file you selected, you can select the API Key you want to use from the dropdown.
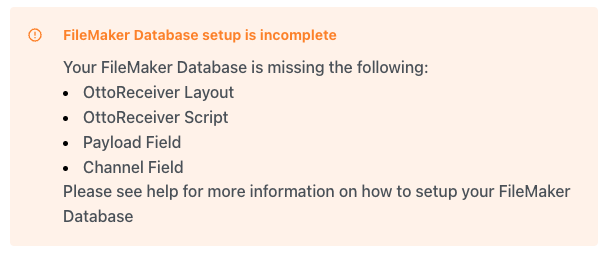
Handle error (if any)
If you get an error that says "FileMaker Database setup is incomplete", you need to install the OttoReceiver.fmaddon file in your FileMaker file. See the FileMaker file preparation section above for more details.
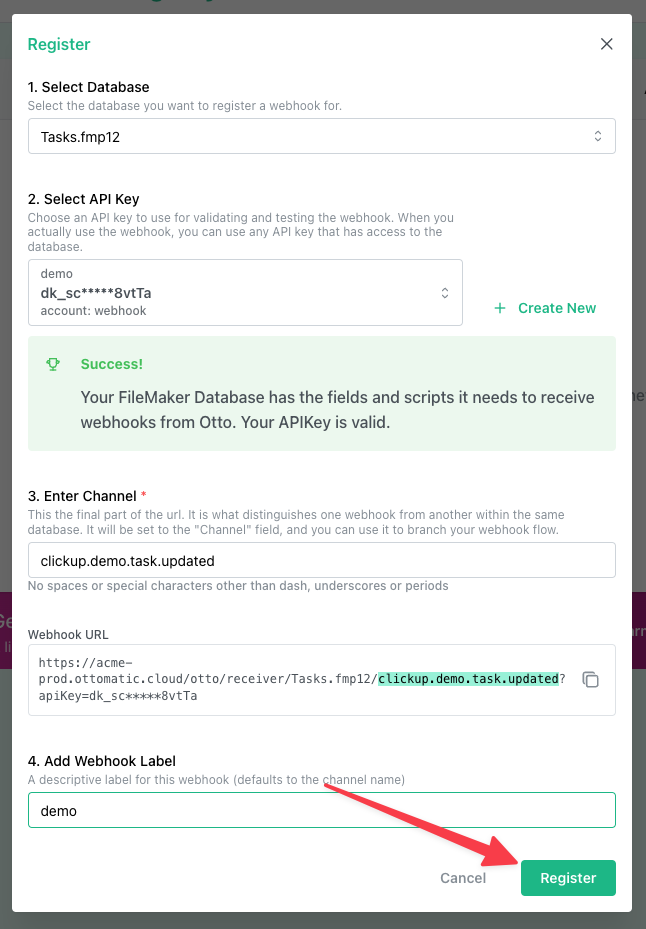
Enter a channel
Enter a channel. Channels are used to identify the webhook. You can use any string you want. It is a good idea to use a channel that is related to the third party service you want to integrate with. see image below
This value will end up in the Channel field of the OttoReceiverInbox table.
Add a label (optional)
Labels are just used to make it easier to identify a webhook. You can use any string you want. see image below
Copy the URL
Copy the URL that is shown in the dialog. You will need this URL to configure your webhook in the third party service you want to integrate with. see image below
Click "Register"
When you are done, click the "Register" button to register the webhook.
Success
You have successfully registered a new webhook. You can now use the URL you copied to configure your third party service to send webhooks to your FileMaker file.
Testing a webhook
Built in test tool
Click the three dots next to the webhook you want to test and select "View/Test" from the menu. Click the "Send Webhook" button to send a test webhook to your FileMaker file.
The Test Result field will show you the result of the test. If the test was successful, you will see the result of the test in the Test Result field. If the test failed, you will see the error message in the Test Result field. It will look something like this:
{
  "success": true,
  "scriptError": 0,
  "scriptResult": {
    "success": true
  },
  "messageRecordId": "4",
  "successMessage": "Message Accepted"
}
Postman
You can also use a tool like Postman (opens in a new tab) to test your webhooks. Send a POST request with a valid JSON body to the URL you copied when you registered your webhook. The JSON body should look something like this:
{
  "message": "Hello World"
}
You can also send a GET request, but you will need to add the ?apiKey=YOUR_API_KEY to the end of the URL. GET requests do not include a payload in the body, but you can include other query parameters in the URL:
https://[your.server.host]/otto/receiver/Database.fmp12/[channel]?apiKey=dk_12395874&message=Hello%20WorldYou should get something similar to this and the status code should be 200.
{
  "success": true,
  "scriptError": 0,
  "scriptResult": {
    "success": true
  },
  "messageRecordId": "4",
  "successMessage": "Message Accepted"
}
Handling incoming webhooks
Once you have registered a webhook, you can start handling incoming webhooks. OttoFMS will automatically create a record in the OttoReceiverInbox table for every incoming webhook. The record will contain the following fields:
- Channel
- Payload
The Channel field will contain the channel you specified when you registered the webhook. The Payload field will contain the JSON payload of the webhook.
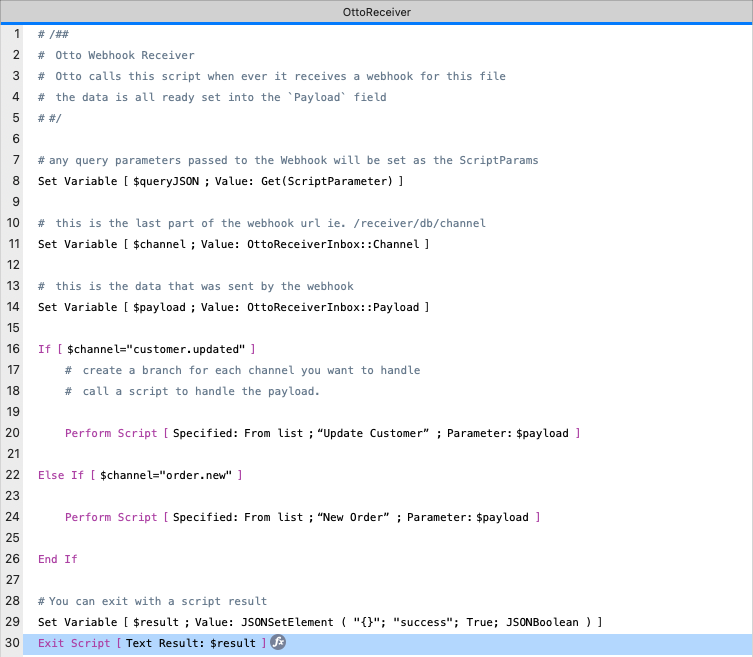
OttoFMS will then call the OttoReceiver script in your FileMaker file. You can use this script to process the webhook, and optionally return a result to send back to the caller of the Webhook.
Modify OttoReceiver script
Modify the OttoReceiver script to process the webhook. Create an IF/ELSE IF branch in the script for every channel you want to handle. See the image below for an example.
SimpleQ
SimpleQ is a more advanced and powerful way of handling incoming webhooks. It allows you to queue webhooks and process them asynchronously. See the SimpleQ guide for more details.
Video
Here is a video that shows you how to setup webhooks.